Looney Tunes: Milano Relabel 100% DIY (1 Viewer)

Mick

Pair
Joined
Aug 22, 2022
Messages
107
Reaction score
233
Location
Edmonton, Canada
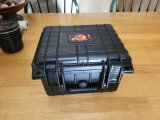
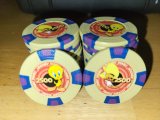
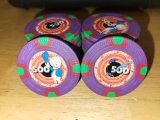
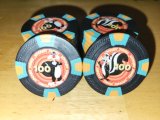
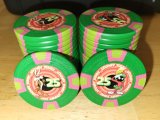
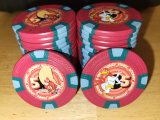
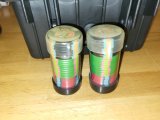
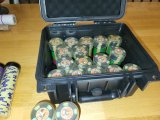
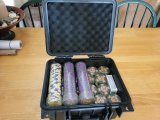
After finishing my other Milano relabel project, I had a bunch of leftover chips that weren't going to get used, so I decided to make a second set and gift them to a friend for his birthday. He's a looney tunes fan, and I thought this would be a fun project. Figuring the denominations in pennies, these work perfect for our micro stakes 5c/10c game. There's 18 starting stack tubes with $10 (10x5c, 10x25c, 7x$1) 2 tubes with 50 $5 chips each, and 1 tube with 50 $25 chips. 636 chips total in the set.

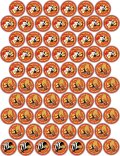
As with the other project, I laser printed these on 8.5x11 vinyl stickers, 65 labels to a sheet, laminated them with clear adhesive vinyl, and punched them by hand with my homemade punch. I think they turned out better than ok. A lot of hours, but very little money.
 

Attachments

  • 20230515_073701.jpg
    20230515_073701.jpg
    120 KB · Views: 614
  • 20230515_075635.jpg
    20230515_075635.jpg
    115.6 KB · Views: 652
  • 20230515_075435.jpg
    20230515_075435.jpg
    132.6 KB · Views: 645
  • 20230515_074756.jpg
    20230515_074756.jpg
    135.2 KB · Views: 633
  • 20230515_074536.jpg
    20230515_074536.jpg
    136.5 KB · Views: 625
  • 20230515_074355.jpg
    20230515_074355.jpg
    143.9 KB · Views: 592
  • 20230515_074052.jpg
    20230515_074052.jpg
    114.3 KB · Views: 559
  • 20230515_074040.jpg
    20230515_074040.jpg
    155.8 KB · Views: 494
  • 20230515_073735.jpg
    20230515_073735.jpg
    161.6 KB · Views: 486
Last edited:
They were a hit, my buddy couldn't have been happier with the gift. The whole kit couldn't have worked better, we even got one of the yellow $25 chips in play in our 5c/10c game! I meant to take pics, but I never remember in the moment.

The tube system makes rebuys sooo much easier. All-in, lose, pass a tube, back in play immediately! Reload the tubes and bring in $5 chips at your leisure, no interruption of game flow ever. Packing up at the end of the night took about 4 minutes with 3 of us packing tubes. Easy game.
 
Here's a writeup of my DIY process that I'm cut-pasting here from my reply in another thread:

1. I used inkscape to make vectors of all my graphics, and sized them so that they would be maximum quality when printed. I then exported my completed label sheets (I got 65 1" labels per sheet) and turned them into BMPs. I then did test prints on regular paper, making tweaks until I was sure the labels would be sized perfectly for my chips. As seen in the image below, each label has a grey circle outside the label area to aid in centering the punch.

2. Print out my HD labels image (2550x3300 pixels per sheet) onto 8.5x11 laser printer compatible adhesive vinyl. I chose laser because I was worried inkjet might smear, and my wife has free use of a professional quality laser printer at work. This is the vinyl I chose: https://www.amazon.ca/dp/B09B28DBDG?psc=1&ref=ppx_yo2ov_dt_b_product_details

3. Cut my laminate material into 8.5x11 sheets, and apply it to the printed sheets, being careful to allow no bubbles between sheets. The laminate I got was 3m and came on a roll. It was not advertised as 3m, but had markings on it to indicate that. This is the stuff I used, it's glossy but I'd have preferred matte if I could have found it: https://www.amazon.ca/dp/B09HL5GC1R?psc=1&ref=ppx_yo2ov_dt_b_product_details

4. I found a piece of thick-walled steel tubing close to the right size for my labels. I carefully filed, sharpened, and shaped it until it was making the exact size circle I needed. This took awhile to dial in, but it worked great. You can see it in the pics in this thread: https://www.pokerchipforum.com/threads/you-guys-decide.102594/

5. I made an anvil table. Basically this was a 4"x4"x30" length of timber that ran continuous from the concrete floor to the underside of my plywood work surface, so that every hammer blow while punching was as efficient as possible, no wiggle at all. I put a "T" set of legs on it just to balance it upright, then routered out a square in the top of the work surface directly over the 4x4 for a 1/4" thick, 2" square of lexan (polycarbonate plastic) to hammer into. I found this was the perfect surface to punch into to make very crisp punches. The lexan was sacrificial and had to be replaced every sheet or 2, but it was very worth the hassle.

6. Put in earplugs. Hammer and punch and sharpen, hammer and punch and sharpen, hammer and punch and sharpen, hammer and punch and sharpen, hammer and punch and sharpen, hammer and punch and sharpen, hammer and punch and sharpen, hammer and punch and sharpen, hammer and punch and sharpen. You get the idea. For HOURS and HOURS. Edit: By the end I was down to about 10 minutes per sheet to punch them, around 500 labels per hour, and this was with me being very anal about centering them.

All in all it was a very fun project, and I did over 2800 pro-quality labels for under a hundred bucks, if you don't count money I spent experimenting. Under $200 Canadian even with the failures and experiments in the beginning. I'd definitely do it again.
 

Attachments

  • a print 6.jpg
    a print 6.jpg
    349.7 KB · Views: 168
Last edited:
..... and my wife has free use of a professional quality laser printer at work. This is the vinyl I chose: https://www.amazon.ca/dp/B09B28DBDG?psc=1&ref=ppx_yo2ov_dt_b_product_details

Sorry to threadjack an old post but I wanted to pick up on one part and ask a question. @Mick mentioned his wife had access to a color laser printer at work. I don't, but I have some cheap chips I want to relabel (relabeling $500's as 25c's). I have a design in inkscape that's close enough to the rest of the set and I have a roll of clear laminating paper from another project (enough to do 150 chips - 300 labels) but my laser printer is B&W only. Does anyone know if Office Depot, Staples or other similar walk in place will do color printing on flat label stock (eg: Avery or similar)? I would expect to have to purchase the label stock there which is reasonable.

If I have to do them as B&W I will, they are going on a gray chip so the gray scale might work
 
I'd bet that if you purchased the vinyl sheets to print on you could get any photo service to print them. Walmart does photo still, don't they? Worth asking them about it, anyway. I don't think I'd trust paper based labels, even with laminate on them. Be a shame to risk all the work you put into it just to save a negligible bit of money.
 
These are one of the best designs I’ve seen on the site so far. If I hadn’t had my heart set on another design for my future set I’d be stealing this. Awesome job!!!!!
 
Good to see people putting some passion into chips that aren’t stupid expensive. Awesome set and nice job!
 
After finishing my other Milano relabel project, I had a bunch of leftover chips that weren't going to get used, so I decided to make a second set and gift them to a friend for his birthday. He's a looney tunes fan, and I thought this would be a fun project. Figuring the denominations in pennies, these work perfect for our micro stakes 5c/10c game. There's 18 starting stack tubes with $10 (10x5c, 10x25c, 7x$1) 2 tubes with 50 $5 chips each, and 1 tube with 50 $25 chips. 636 chips total in the set.

As with the other project, I laser printed these on 8.5x11 vinyl stickers, 65 labels to a sheet, laminated them with clear adhesive vinyl, and punched them by hand with my homemade punch. I think they turned out better than ok. A lot of hours, but very little money.
These are gorgeous!! What measurement did you use for the labels???
 
Sorry to threadjack an old post but I wanted to pick up on one part and ask a question. @Mick mentioned his wife had access to a color laser printer at work. I don't, but I have some cheap chips I want to relabel (relabeling $500's as 25c's). I have a design in inkscape that's close enough to the rest of the set and I have a roll of clear laminating paper from another project (enough to do 150 chips - 300 labels) but my laser printer is B&W only. Does anyone know if Office Depot, Staples or other similar walk in place will do color printing on flat label stock (eg: Avery or similar)? I would expect to have to purchase the label stock there which is reasonable.

If I have to do them as B&W I will, they are going on a gray chip so the gray scale might work
If you are going to Office Depot there is a better way to laminate your labels.

Get your printing done

Go to Office Depot and choose your laminate from their stock

Get them to laminate two sheets at a time - back to back with labels on the outside.

Trim the laminate edges and separate the sheets. Both are now laminated on the front but not the back

Punch out and enjoy
Great info.
 
These are gorgeous!! What measurement did you use for the labels???
I don't remember exactly. I made the punch from scrap material I had laying around, and I just kept modifying it until it was a good fit.

Edit: from my other thread it looks like they are 24mm
 
I don't remember exactly. I made the punch from scrap material I had laying around, and I just kept modifying it until it was a good fit.

Edit: from my other thread it looks like they are 24mm
Thank you!
 

Create an account or login to comment

You must be a member in order to leave a comment

Create account

Create an account and join our community. It's easy!

Log in

Already have an account? Log in here.

Back
Top Bottom