You’re very welcome, of course.
Regarding the issue of color fading mentioned in several recent posts…
Many years after my original post, “Lundmark TSP” (or as I like to call it, “Lundmark Not Really TSP” - but hey, it works better than real TSP) remains my go-to for very effective and relatively low effort chip cleaning in an ultrasonic bath. I’ve cleaned somewhere around 100k chips, and that’s not an exaggeration.
That said, some degree of color fading occurs with ANY cleaning solution, and even in just plain hot water (search for some old replies in this thread regarding hot water pre-soaks)! Purple, red, and green seem to be more susceptible to fading than other colors.
Because of that, over the years, I’ve experimented with alternate cleaning agents and methods. Recently, I tried something different/new, and it had better results, although I used a manual process, and spent over 2 hours to clean just a single rack of chips. (Ouch.)
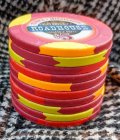
Take a look at the Paulson “Cherry” chips in photo below (the spots are Paulson “Peach” and “Metallic Gold”). These chips have *not* been oiled; they’ve only been cleaned:
View attachment 1324477
Manual labor aside, I was pretty happy with the results. While the chips don’t look “wet”, as chips do when they’ve been oiled, they don’t look dried out. I’d say they look “hydrated”.
")
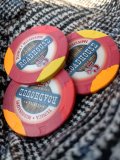
These chips are now soaking in J&J gel, and look edible!
Now… if I can manage to combine that with ultrasonic cleaning to add “fast and easy” to the effectiveness (is that a word?), I’ll take more photos and post details of the method.
I’m quite optimistic, or I wouldn’t have posted this, but nothing is guaranteed…