Another Spirit Mold Concept - Masterworks (1 Viewer)

CrazyEddie

Full House
Joined
Jul 25, 2020
Messages
4,448
Reaction score
8,165
Location
Georgia
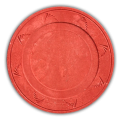
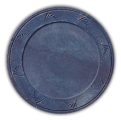
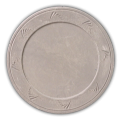
Now that Spirit Molds are back in stock at Chips and Games (how? who knows? for how long? who knows?) I went and bought a ton of all the colors I don't already have a ton of - which turned out to be just the solids, in grey / red / blue. They're cheap, so I bought them despite having no idea what to do with them.

Well, a day later inspiration struck, and a day after that I now have some mockups to share.

At first I was thinking I might do something like the Ameristar Chicago chips, which despite being RHC I'm absolutely in love with:

1642549382297.png
1642549390008.png
1642549396095.png


1642549401543.png
1642549407664.png
1642549416307.png


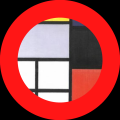
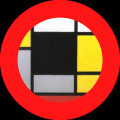
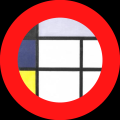
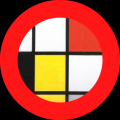
That got me thinking about modern art styles, and pondering which styles I might try to replicate. Which then got me thinking about Piet Mondrian and his famous colored-rectangle paintings:

1642549497647.png
1642549520313.png


... but then I thought, why limit myself to one artist, or one style? Why not pay tribute to ALL of my favorite works of art?

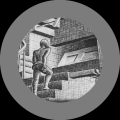
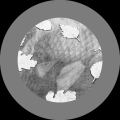
So, now, as a proof of concept, I present: Masterworks, a chipset in four denominations.

Grey:
1642549751041.png
1642549803424.png1642549824333.png1642549841785.png
1642549891153.png1642549913902.png1642549969313.png1642549983187.png
1642550073605.png1642550092679.png1642550140004.png1642550163628.png

[to be continued next post]
 
Blue:

1642551743181.png

1642550938432.png1642550953701.png1642550974768.png
1642550987413.png1642551000645.png1642551018795.png
1642551045158.png1642551061384.png1642551074013.png
1642551094315.png1642551109323.png
1642551127070.png

And finally, for the fourth denomination, I plan to use ceramic plaques and reproduce the entire paintings that the chips above have excerpts from.

I'll leave them all undenominated, and in fact will leave them entirely without text or markings on at least one side. I haven't yet decided whether to do that on both sides, or to have the artwork on one side and some sort of text or logo on the opposite side. I'm still playing around with the concept.

Obviously each color / denom will have numerous different designs, which of course is rather unusual for a chipset. But I don't think it'll cause any gameplay problems, and given that I've got a "scheme" for each color (grey = black-and-white, red = bright colors, blue = dark colors and/or blue) I think the chips will look attractive when splashed out in a pot even with having so many different individual pictures on them.

Hopefully I can get some labels printed up and cut out in the next few days, and can put the whole set of images onto actual chips and see how they look on the table. Will post more pictures when I do!
 
Last edited:
It works great! The auto-registration feature is a little temperamental, but it usually works, and it's super-convenient.

I've used it to make glossy laminated vinyl labels, but they were glossier than I wanted. I've used it to make unlaminated vinyl labels, but that leaves the toner unprotected, and the finish is more matte than I wanted. So for my next try I'll print on the unlaminated vinyl, cut the labels, and then spray the sheet with satin clearcoat before removing the labels from the sheet. Maybe that'll get me what I'm looking for.
 
From a thread I read somewhere, I saw people recommend printing on glossy vinyl and then putting a matte laminate on it, which is what I did. It allows the image to be nice and vibrant without the label being overly shiny.

I did try various combinations, but printing on either matte or glossy vinyl and then applying a glossy laminate was too shiny, matte vinyl w/matte laminate was too muted.

I thought about doing the spray route, but I was worried about uneven coverage and whether the sealer/finisher would stand up to the handling that a poker chip endures. But that might work well for an overlabel because the spray would be thinner than a laminate.

The labels I make are too thick for an overlabel. Was thinking about doing glossy laminate for just my fracs for my Paulson set because it's thinner than the matte laminate. Don't want to do unlaminated for the same reason you mentioned.
 
I didn't have much luck finding matte laminate, but I'll look again. If you've got a pointer to the products you've used successfully, I'd certainly be grateful!

Using the vinyl sticker sheets I have (thickness unspecified) and 3mil lamination sheets, the labels ended up a perfect thickness for the Spirit Mold blanks I've got - thick enough to mostly fill the recess but thin enough that they don't quite fill the recess.
 
This is what I use: https://www.amazon.com/gp/product/B08XSGFDH3/

It's a bit of a pain because it's a roll so when I cut them, they curl. I space out my labels into 4 quadrants in the print-and-cut area, and then cut the laminate into 4 smaller pieces, rather than trying to evenly apply a 6"x9" piece of laminate to the vinyl after printing before cutting. It's more time consuming but I end up with fewer errors, and the finish product looks really nice, like you can't tell there's a laminate on top of the printed vinyl.

Surprisingly hard to find flat laminate sheets in matte. Everything's in glossy.

Was thinking about trying this: https://www.amazon.com/gp/product/B002HJBH5E/

It's not a laminate sheet but rather a clear label. The material is listed as "paper" but I can't imagine it's actual paper seeing as it's clear. Still, I can't confirm what kind of material it is. Reviews mention it's tearable and not fully waterproof, so maybe it is paper-based. But I was thinking, I really just need a thin barrier to protect against touch. I'm not (planning on) getting my chips wet or playing out in the sun, so UV protection and other features of laminates aren't must-haves.

(I didn't end up getting it, but I might if I go back into label production again, just to see how it is.)
 
Huh. How 'bout that. I'd just been looking for thermal laminate, but I guess there's no reason self-adhesive wouldn't work just as well. Thanks for the pointers!
 
I don't have a thermal laminating machine. I almost bought one because it's more forgiving, whereas one slip of the hand with the self-adhesive one and you might have to scrap part of a sheet. (The glossy vinyl helped with that, you could actually lift and restick the laminate if you hadn't pressed down hard. But on matte vinyl, once it touched it was stuck.)
 
I love the idea of a Piet set. Not sure how a set would work going across multiple art styles and stay cohesive but I'm interested in what you come up with.
 
Last edited:
I love the idea of a Piet set. Not sure how a set would work going across multiple art styles and stay cohesive but I'm interested in what you some up with.
Thanks! In all honesty I'm not expecting a lot of cohesion, with most of it coming from the solid colors of the base chips. But I'm hoping that'll be enough; it just needs to carry the concept.
 
This is what I use: https://www.amazon.com/gp/product/B08XSGFDH3/

It's a bit of a pain because it's a roll so when I cut them, they curl. I space out my labels into 4 quadrants in the print-and-cut area, and then cut the laminate into 4 smaller pieces, rather than trying to evenly apply a 6"x9" piece of laminate to the vinyl after printing before cutting. It's more time consuming but I end up with fewer errors, and the finish product looks really nice, like you can't tell there's a laminate on top of the printed vinyl.

I picked up a roll of the laminate you linked to and I freaking love it. I'm printing onto vinyl sticker sheets, then pressing the laminate on top of that, then cutting in the Cricut and they're turning out perfect. At least as far as the texture and sheen goes. The laminate is very slightly textured and has a matte finish, and the resulting labels are exactly what I want them to be. They're the perfect thickness to just barely not quite fill the Spirit Mold recess, and they look and feel veeeery niiiiice.

I'm having some issues with the print quality, so I'll be dinking around with my laser printer settings for a while until I'm satisfied.

I've had pretty good luck applying the laminate to the sticker sheet. I trim the sticker sheet so that it's not much larger than the Cricut print-and-cut area, then put that on the Cricut mat, then cut a strip of laminate that's a little bit bigger than that. I lay that on top of the sticker sheet (with the laminate's backing still attached) so that the edges are in contact with the mat sticky area, and that helps keep it from curling up. Then I peel away the backing from half of the laminate and cut it away with a pair of scissors, then smooth down that half of the laminate back on top of the sticker sheet, which it adheres to. Then I lift up the other half, peel away its backing, and smooth it back down. Then I go over the whole thing with a rubber roller that came with the Cricut. I've done this twice so far and gotten good results.

Thanks for the pointer! Once I fix the print quality I think I'll be very happy with the resulting chips.
 
Glad these worked out for you! I really like the way they look and feel too! Will maybe try your technique in the future!
 

Create an account or login to comment

You must be a member in order to leave a comment

Create account

Create an account and join our community. It's easy!

Log in

Already have an account? Log in here.

Back
Top Bottom