Barrington poker table thread (12 Viewers)

I didn’t know these LEDs existed, those are fantastic! Could should shoot a couple close up pics with them on and off? Would love to see how they look wedged in there.
Thanks! I was excited when I found them also. And I really liked that they were waterproof, not for the risk of spilling or anything, but because it meant that they would have a silicon rubber covering that would work perfect when wedged in.

Screenshot 2024-01-10 7.29.58 PM.png


Close Up of COB LEDs
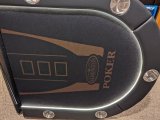
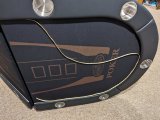
Here are some close up pics. When you dim them down and look right at them you can see the individual LEDs still, but it is waaaay better than standard LED strips that have an inch or two space between each light.

PXL_20240111_003820417.jpg
PXL_20240111_003904572.jpg


Should still see plenty of light once I get a topper ordered also.

PXL_20240111_003840141.jpg
 

Attachments

  • PXL_20240106_034252095 (1).jpg
    PXL_20240106_034252095 (1).jpg
    168.4 KB · Views: 127
  • PXL_20240106_032955623.jpg
    PXL_20240106_032955623.jpg
    191.8 KB · Views: 116
Thanks!

Pre-drilling
What I meant by pre-drilling is just drilling a pilot hole through the wood as close to the center as you can get after you pull out the old cup holder. If anything just a hair closer to the playing field, not closer to the seating area (to avoid hitting the inside edge with your hole saw).

View attachment 1253630

Then, after you have your pilot hole drilled, you know exactly where you need to start drilling with your hole saw from the other side by matching up the center drill bit of your hole saw with the hole you just made.

View attachment 1253631

Go slow and try to recognize how deep you are so you know when you are close. You are going through 2 pieces of wood.

View attachment 1253634

Removing LEDs
I did not remove the old LEDs. I just threw the new COB LEDs over the top of the originals to "see what they look like" but they fit so nice I just left them there. Kept the adhesive backing intact I did peel back about 4 inches on the ends exposing the adhesive since that does need to be attached securely at the table divide, and stuck it right to the current LEDs.
Thank you. I'm officially a dumbass... I didn't realize there was wood under the cupholders... I guess I didn't pay much attention when I had mine out of the box - which was only for about an hour just to make sure there was no damage.
 
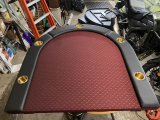
Can’t decide on speed cloth color, anyone passionate about a specific color and mind sharing some pics?
 
…it was a bit of a struggle with the hole saw I bought. If I would do it again, I would get one that was deeper. This one barely made it through both pieces of wood.

Jumbo Cupholders
Hole Saw (buy a deeper one)
I’m curious if the both pieces were glued together? If not, is it possible to drill through the first layer, remove the wood from the hole saw, then continue through the second layer?
 
I’m curious if the both pieces were glued together? If not, is it possible to drill through the first layer, remove the wood from the hole saw, then continue through the second layer?
Yes, and this actually happened on two or three of the holes that I drilled. The hole saw was heating up the table so much that the glue will melt and get sticky and then as I was kind of rocking the hole saw back and forth a little the top part came off (which is the solid wood) and then the lower portion is just the extra ring that the cup holder sat in (that you are currently expanding for jumbos)
 
Has anyone tried to put electrical tape or something similar over the leds to diffuse them a bit? They are way too fuckin bright.
 
Get a dimmer switch for them. If you are going to use the lights, a dimmer is a must!
I got one that was suggested on this thread and it barely makes a difference. Might try to black em out or just give up on em all together.
 
I got one that was suggested on this thread and it barely makes a difference. Might try to black em out or just give up on em all together.
I would respectfully disagree that it barely makes a difference. Turning the dimmer down to the lowest setting makes a huge difference from the unusable brightness of the full on LED's.
 
Interesting. Perhaps I hooked it up wrong, I’ll give it another shot.
Tried it again and the dimmer works wonderfully when plugged in using the included wall plug but makes almost no difference at all when using the battery pack that was suggested in this thread. Is there a trick that I am missing?
 
Many here recommend a dimmer for the LEDs. I agree. I bought a dimmer and a rechargeable 12V battery pack that I installed on the bottom of the table using 3M command strips. I haven’t taken a photo of mine but I got the idea from @BLK21JK and his photo here…

https://www.pokerchipforum.com/threads/barrington-poker-table-thread.30910/post-2302704

I bought:

https://www.amazon.com/dp/B092HX9435?ref=ppx_pop_mob_ap_share

https://www.amazon.com/dp/B01M7Z9Z1N?ref=ppx_pop_mob_ap_share
How did you get these two to work together? The dimmer works great when plugged into the wall with the provided plug that comes with the table but when using the battery pack and dimmer it doesn’t work at all. How and what are you using to hooking the 3 together? I just be missing something. Any help would be great.
 
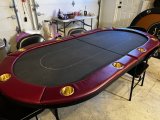
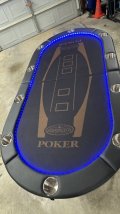
So I finished my Barrington mods (for now) but still need to order a topper.

New LEDs, Dimmer, AA Battery Pack, and Jumbo Cupholders

COB LEDs

I wasn't the biggest fan of the blue LEDs and didn't like how they were so spaced out. I saw someone talk about the COB LEDs and how they are amost diffused already and ordered the warm white and couldn't be happier. The LEDs are very close together so you don't need to put something in front of them to diffuse them like I was trying to do with the old LEDs. Instead of ripping out the old LEDs, I actually just wedged the new LEDs right on top of the current ones. It worked out great.

I did have to cut the light strip and attach another tail end. Very easy to do but measure accurately before you cut! You don't have much leeway with the 16.4ft strip. And then used the Y connector that also came with the COB connector package.

Screwed and glued on some velcro, glued velcro to the battery pack, then buttoned up everything else. Happy with it.

COB LED Lights
COB Connector Package
Dimmer
Battery Pack

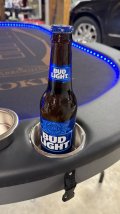
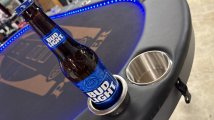
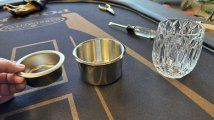
Jumbo Cupholders
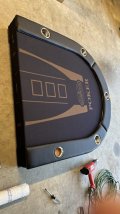
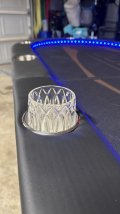
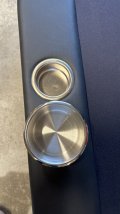
I went with the jumbos after reading recommendations. Pried off the old ones with a vise grip, drilled a center hole down with a standard bit, then drilled from the bottom up with the 3 5/8in hole saw starting it the pre drilled hole. I got them all done but it was a bit of a struggle with the hole saw I bought. If I would do it again, I would get one that was deeper. This one barely made it through both pieces of wood.

Jumbo Cupholders
Hole Saw (buy a deeper one)

View attachment 1252914
So I've ordered the hole saw. Should be here tomorrow. To do this properly, I need to fully saw through the wood? And did you start top down or from the bottom and does it matter?

Do I need to remove the rails to do this?
 
So I've ordered the hole saw. Should be here tomorrow. To do this properly, I need to fully saw through the wood? And did you start top down or from the bottom and does it matter?

Do I need to remove the rails to do this?
I just finished mine last night with the guidance of this amazing group.

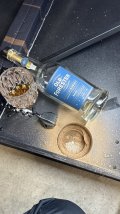
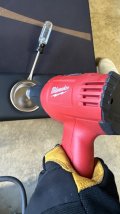
1. Remove the cup. I used a heat gun and it loosened up the glue and the cup just slid right out.
2. Find the middle of the cup and move a hair towards the table and drill a pilot from the top. No need to remove rail.
3. From the bottom, use your hole saw to cut through the wood.
4. Go easy as you will be cutting through 2 pieces of wood. I stopped after the first piece and then vacuumed out the dust to see where I was. Just so I didn’t saw all the way to the vinyl. The second piece of the wood is glued to the foam.
5. When I loosened the second piece of the wood I used a box cutter to trim the foam and be careful to not cut the vinyl.
6. I replaced some of the cut foam back to give it more cushion around the cup holder.
7. Pushed the cup holder into place and boom. Done!

I’m assuming you went with the 3-5/8” hole saw and jumbo replacement cup holders.

Hope this helps.
 

Attachments

  • IMG_6652.jpeg
    IMG_6652.jpeg
    103.9 KB · Views: 158
  • IMG_6663.jpeg
    IMG_6663.jpeg
    90.4 KB · Views: 160
  • IMG_6662.jpeg
    IMG_6662.jpeg
    83.1 KB · Views: 157
  • IMG_6661.jpeg
    IMG_6661.jpeg
    88.5 KB · Views: 156
  • IMG_6660.jpeg
    IMG_6660.jpeg
    75.8 KB · Views: 153
  • IMG_6658.jpeg
    IMG_6658.jpeg
    177.8 KB · Views: 148
  • IMG_6657.jpeg
    IMG_6657.jpeg
    91 KB · Views: 153
  • IMG_6656.jpeg
    IMG_6656.jpeg
    93.6 KB · Views: 154
  • IMG_6655.jpeg
    IMG_6655.jpeg
    67.6 KB · Views: 149
  • IMG_6654.jpeg
    IMG_6654.jpeg
    120.1 KB · Views: 142
  • IMG_6653.jpeg
    IMG_6653.jpeg
    131.7 KB · Views: 157
How did you get these two to work together? The dimmer works great when plugged into the wall with the provided plug that comes with the table but when using the battery pack and dimmer it doesn’t work at all. How and what are you using to hooking the 3 together? I just be missing something. Any help would be great.
Perhaps you could post a photo of what you’ve done? If it isn’t working for you, perhaps the battery pack is dead? You are using the rechargeable one or the one with AAs?
 
I just finished mine last night with the guidance of this amazing group.

1. Remove the cup. I used a heat gun and it loosened up the glue and the cup just slid right out.
2. Find the middle of the cup and move a hair towards the table and drill a pilot from the top. No need to remove rail.
3. From the bottom, use your hole saw to cut through the wood.
4. Go easy as you will be cutting through 2 pieces of wood. I stopped after the first piece and then vacuumed out the dust to see where I was. Just so I didn’t saw all the way to the vinyl. The second piece of the wood is glued to the foam.
5. When I loosened the second piece of the wood I used a box cutter to trim the foam and be careful to not cut the vinyl.
6. I replaced some of the cut foam back to give it more cushion around the cup holder.
7. Pushed the cup holder into place and boom. Done!

I’m assuming you went with the 3-5/8” hole saw and jumbo replacement cup holders.

Hope this helps.
Well done!!
 
How did you get these two to work together? The dimmer works great when plugged into the wall with the provided plug that comes with the table but when using the battery pack and dimmer it doesn’t work at all. How and what are you using to hooking the 3 together? I just be missing something. Any help would be great.
Those PWM rotary dimmers for LEDs are not bi-directional - you have to have the “input” pigtail connected to your battery pack and the “output” pigtail to the LEDs.

Easy to miss and not a big deal, unless your battery and/or LED strip has a M connector where you want a F connector - then you’ll need an adapter or need to cut/splice a connector or two.

I encountered this with the rechargeable battery pack that I’m using, but it came with a Y-connector cable with both M and F plugs so I shoved that in the chain and all was good.
 

Create an account or login to comment

You must be a member in order to leave a comment

Create account

Create an account and join our community. It's easy!

Log in

Already have an account? Log in here.

Back
Top Bottom