Barrington poker table thread (12 Viewers)

I just did it after taking the cup holders out and waiting 3 weeks being too scared to actually drill into it. Only went too far on the first two but still no issues. What a game changer. Whoever is out there debating it - DO IT.

However, I will join the general consensus - Get a GOOD drill bit. I got the cheapest one I could find thinking I will never use it again - It torqued and twisted and I went through 3 batteries drilling the 10 holes. Brother in law is a plumber and let me use his after doing 6 and wanted to give up due to wrist pain. His was a much better brand and didn't snag up once.

Also recommendations:

1.) There are two layers of board (at least with mine) You can feel once you get through the first layer. I would stop and take the plug out of the bit. This helped tremendously with not catching/ torquing my wrist.
2. A good way to make life easier and not torque, is to slowly apply pressure while drilling straight down in a circular motion. This sped the time up greatly.

I actually had to rip some of the foam off for the last 8 due to it being too tight.
 
Last edited:
Has anyone used cupholders that are the same diameter, just deeper? It seems like most have gone the “jumbo” 4 inch diameter route which require expanding the existing cutout. I dont think ill need anything wider than a can or bottle so, if possible would prefer the easier diy.

Can’t seem to find anything online that fits. I measured and my Barrington w/ LED cup holders are 3 3/8 edge to edge.
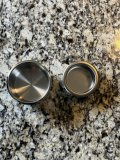
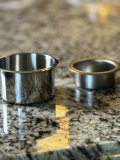
So, I just found these. Same 3.5" lip to lip and about a half an inch deeper. Not sure how meaningful the extra half inch deep will be; though I like the idea of the same outer dimensions.

https://isuremarinehardware.com/pro...ndard-soda-can-for-desk-boats-rv-cars-trucks/

They also have them on Amazon, but the pricing isn't as good (2 for $16 on Amazon vs 4 for $20 direct).
https://www.amazon.com/dp/B0CPXSWVN...I7Y2Y1BEC&ref_=list_c_wl_lv_ov_lig_dp_it&th=1
I found the above cupholders with the same outer dimensions. I ended up getting the larger and deeper ones everyone got. I'm very glad I went with the larger cupholders, but above is the links if you decide to just go deeper.
 
Has anyone used cupholders that are the same diameter, just deeper? It seems like most have gone the “jumbo” 4 inch diameter route which require expanding the existing cutout. I dont think ill need anything wider than a can or bottle so, if possible would prefer the easier diy.

Can’t seem to find anything online that fits. I measured and my Barrington w/ LED cup holders are 3 3/8 edge to edge.
You still need to cut holes with the smaller cup holders...why not get larger ones while you're going through the trouble?
 
Last edited:
You still need to cut holes with the smaller cup holders...why not get larger ones while you're going through the trouble?
I second this. This was my exact thought process. I actually bought deeper ones of the same width first and was irritated by the fact that the only fit beer bottles or cans, whiskey glasses and beer glasses were way to big to fit. Ended up going with wider cupholders and couldnt be happier.
 
If you’re going to go to a forum for experts opinions… take their advice! Just want to say I appreciate you guys swaying me to the jumbo cup holders rather than just deeper. I cant emphasize enough how glad i am went this route. Night and day difference!

Used @RadicusScout blueprint from few pages back and worked flawlessly. One of the first diy projects that didn’t end up with multiple Home Depot trips or scouring YouTube to find a solution for a surprise/disaster mid project.

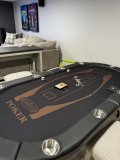
I went w/ the 3 5/8 Milwaukee and 3/8 Arbor. Worked like a charm. Once i get my custom topper and chips from the upcoming group order ill post better pictures but for the time being
 

Attachments

  • IMG_5605.jpeg
    IMG_5605.jpeg
    119.8 KB · Views: 128
  • IMG_5600.jpeg
    IMG_5600.jpeg
    286.7 KB · Views: 128
  • IMG_5599.jpeg
    IMG_5599.jpeg
    106.5 KB · Views: 124
If you’re going to go to a forum for experts opinions… take their advice! Just want to say I appreciate you guys swaying me to the jumbo cup holders rather than just deeper. I cant emphasize enough how glad i am went this route. Night and day difference!

Used @RadicusScout blueprint from few pages back and worked flawlessly. One of the first diy projects that didn’t end up with multiple Home Depot trips or scouring YouTube to find a solution for a surprise/disaster mid project.

I went w/ the 3 5/8 Milwaukee and 3/8 Arbor. Worked like a charm. Once i get my custom topper and chips from the upcoming group order ill post better pictures but for the time being
That's an awesome looking upgrade! I'm happy my guide helped.

Looking forward to seeing the entire ensemble!
 
Can you guys please let this thread die before I end up buying one of these sumbitches.:confusedView attachment 1317457

Honestly, this table is great value for the money, especially if you wait for a sale. In hindsight, if I were playing with dice chips on a dining table, I’d upgrade to this table before getting chips. I also think it’s fine stock (the heavier LED version, at least), but definitely deeper/wider cup holders would be a nice upgrade, but not a must have for me. I’m thinking about a topper for purely aesthetic reasons, but the felt is fine and the crease in the middle went unnoticed during play.
 
Honestly, this table is great value for the money, especially if you wait for a sale. In hindsight, if I were playing with dice chips on a dining table, I’d upgrade to this table before getting chips. I also think it’s fine stock (the heavier LED version, at least), but definitely deeper/wider cup holders would be a nice upgrade, but not a must have for me. I’m thinking about a topper for purely aesthetic reasons, but the felt is fine and the crease in the middle went unnoticed during play.
The table is without question a monster step in the right direction if you're playing on some random table. And yes, it's my opinion too that the table should be upgraded before the chips, the table seems to be more important.

My issue with stock cup holders was that they appear to be cup holders, but they are closer to coasters. And I'm not against coasters, I played on a lifetime foldable table with some cheap felt I just put on top from Amazon for a long time - never had a spill. But, when you appear to be a cup holder when you're infact just a coaster, I felt it was more likely have spills - so I upgraded the cup holders before my first game. It was a pain in the butt, so worth it though.

And I also agree, the stock felt is fine and the crease isn't as bad as one may think. I say that but I do have a custom table top too.
I thought they were ashtrays
 
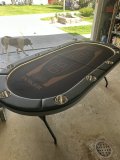
I know it’s been said but anyone on the fence about upgrading the cup holders and adding the cob led lights should DO IT! I finished this morning and wow what a difference the cup holders make.
I got the same lights linked earlier in the thread and they worked out great, it’s almost like they’re diffused already.

I’m not the most handy person, I did build my other table myself though, but this was pretty straightforward. Like everyone says, just go slow. By the start of the third one I was pretty confident and it went smooth from there knowing the feel and sounds to pay attention too. I even stopped a few times each hole to vacuum the saw dust out of the way and take a look.

Well worth the little bit it takes for these upgrades. Next step is a topper from @rjdev7. I just gotta place the order

The lights here are a little hard to see turned as dim as they are in the semi sunlight but they’re plenty bright turned all the way up. I’d say that’s about 20% in the pic which is actually about perfect in person
 

Attachments

  • IMG_7548.jpeg
    IMG_7548.jpeg
    157.2 KB · Views: 110
Are there any other vendors similar to rjdev that offer toppers? It sounds like he is understandably digging out of backlog of requests. I have no problem waiting and plan to buy multiple custom toppers from him based on reviews/feedback and rotate them.

I’d also like to get something nearer-term to get my game going.. can’t be having the black/brown stock barrington for opening night!
 
I recently upgraded my cup holders after a couple of close calls of having drinks spilled onto the playing surface. The cup holders that come with the table are a joke (a very cruel and sad joke). If you're on the fence about upgrading yours, don't delay. Get them upgraded. They're a huge improvement.

View attachment 1289094

I was really encouraged by the posts by @dmoney and @greedyintern. Huge shout out to them and their guides. Those helped tremendously. This is dedicated to @Saoliver who asked for a video (in the thread - not to me personally) but this is as close to a video I could muster. I hope this is helpful. :)

Items/tools:
View attachment 1289142

Step 1: Remove original cup holders

This step is pretty simple. Set the hairdryer on high heat and keep it approximately 1 inch away from the cup holder for about a minute. Most of the cup holders will only require a minute for the glue to loosen up. I only had a couple that needed more time. For those, I did it again for another minute.

View attachment 1289155


After the hairdryer, use the auto trim tool to pry the cup holder away from the loose glue. Work the tool around the cup holder while gently pulling the cup and glue apart.

View attachment 1289156


A couple of things to keep in mind when you remove the cup holder from the table:
  1. The cup holder will be hot from the hairdryer so wear your gloves.
  2. The glue will be very sticky so pull directly up and not to the side. Try not to get any on your the table/padding.

View attachment 1289157


Step 2: Mark the drill hole

Before you move onto this step, make sure all the glue has completely cooled off and dried.

This step is relatively easy but requires some concentration. The exactness of this step will ensure your new cup holders will be where you want them to be.

The original cup holders on my Barrington is measured at 3 1/2" across. You should double check yours if you're going to follow this step of my guide.

View attachment 1289168


The new cup holders measure 4" across.

View attachment 1289169


Since the size difference between the 2 cup holders is 1/2", we will need to mark the new center hole 1/4" away from the original center.

Here is a reference on how I calculated my center hole. I started the measure from the outer edge of the original cup holder. The idea is to mark the new center at the 2" mark.

View attachment 1289453


Here is a better visualization of this. The new center hole has to be 1/4" closer to the table and yet remain in center of the left/right side edges.

View attachment 1289461


I tried using a marker on the glue but found it difficult to accurately mark the exact location of the new hole. I decided to use a screw instead and that worked much better. The good thing about this is that I could move the screw easily to make fine adjustments as much as I needed. Once I've double (tripled!) checked my measurement I screwed in the screw to make a pilot hole. I didn't drill too deep - just deep enough to make a visible hole.

View attachment 1289462


Ultimately, I ended up with this outcome. I then took my 1/8" drill bit and drilled through the table using the pilot hole as a guide.

View attachment 1289471


Step 3: Drill out the new holes (from the bottom)

Flip the table upside down.

Before I drilled the hole with my hole saw, I drilled through the existing hole using the 1/4" drill bit. The reason for this is that the drill arbor is 1/4" so I wanted to make sure the arbor was aligned exactly to the new center. In retrospect, I suspect I could have used the 1/4" bit instead of the 1/8" bit in Step 2 and saved a step.

Drilling the hole was the worst part (for me). The hardest part was intentionally going slow and not hurry the process. The thing to note here is to stop drilling immediately after you've broken through to the foam. I was a nervous wreck trying not to over drill.

As you can see below, the foam is glued to the wood so I had to carefully separate the foam after I had drilled through the wood. Try to retain as much foam as you can in the original hole. This will help with the snugness of the new cup holder.

View attachment 1289474


Here is an "in progress" picture of the process. I really wanted to see the new cup holder put in so I did that one right away (it's rad). I was also doubting I did the math properly in Step 2 so I wanted to quadruple check it was right (it was). TRUST THE MATH!

I also wanted to show the new Barringtons have clearance for the holes without sawing any of the posts.
Please ignore my monstrosity of a drill. The nerds over at r/tools will ban me if they ever saw that thing.

View attachment 1289481


Step 4: Insert new cup holders and ENJOY

This step is easy and the most enjoyable. The new cup holders will be very snug (tight) in the new opening. I used a cardboard sheet to help me evenly apply pressure and knead the cup holder in. Think flattening pizza dough - same idea and motion.

Others mentioned having to tape their new cup holders with masking / duct tape to make them snug but I didn't have to do that. The foam and vinyl were enough to keep these cup holders very tight and snug. Oh, speaking of foam, trim away the excess foam that will be sticking out of the bottom after you're all done.

That's it! Enjoy your new rad cup holders!

Don't yell at me about my chairs. They're next to be upgraded!
View attachment 1289497
Quoting this to force myself to actually do it soon. Ive had the cupholders for too long.
 
Quoting this to force myself to actually do it soon. Ive had the cupholders for too long.
I did the exact same thing - once you realize that basically worst case scenario is the cup holders aren't SUPER tight, which you can fix by wrapping them in tape or saran wrap, and they still will sit in and not fall out - you should get the courage. Only advice I'd give is dish out the extra cash for a really good circle bit. I bought the cheapest on amazon and I mean, you get what you pay for.
 
I’ve been hemming and hawing on the LED version. if it was no light I’d snap one up from the Walmart sale. … these tables look great.
 

Create an account or login to comment

You must be a member in order to leave a comment

Create account

Create an account and join our community. It's easy!

Log in

Already have an account? Log in here.

Back
Top Bottom