KingHigh
Pair
That sounds like a great idea! How did you go about doing that?Was able to remove the strap, cut the hole and reattach it with a screw to the side. Worked out well. Thanks.
View attachment 1249332
That sounds like a great idea! How did you go about doing that?Was able to remove the strap, cut the hole and reattach it with a screw to the side. Worked out well. Thanks.
View attachment 1249332
Thanks for the info. I have a carry bag for my table so drilling through it could work out fine for me is what I’m thinkingI drilled thru mine accidentally and so far still functions fine. But I haven’t tested it extensively, so don’t quote me. Just be careful and be aware it’s lost some strength.
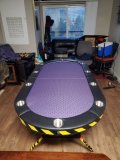
Good looks, but yeah too smallNOTE: I have not purchased this table.
On wayfair. This folding table comes with a cheap bag and deeper cup holders. Not sure how the money works out compared to an on sale Barrington with upgrades, but might be worth a look?
Wayfair LINK
Thanks! I really like them. Here’s the ones I got from Amazon, I believe they’re the same ones linked somewhere earlier in the thread. First is the lights, second is the connectors and third is the dimmers I used.The lights look very cool! Would you mind sending me the link to order? Thanks!
Very cool! I have the newer Barrington without the LEDs. I feel like it would look odd if I just glued LEDs to the inside of the vinyl. Is the Barrington w LEDs railing designed differently?Thanks! I really like them. Here’s the ones I got from Amazon, I believe they’re the same ones linked somewhere earlier in the thread. First is the lights, second is the connectors and third is the dimmers I used.
https://www.amazon.com/dp/B0BVR755VK?ref=ppx_pop_mob_ap_share
https://a.co/d/0ie6XsZe
weideer 2Pcs DC12V-24V LED Strip... https://www.amazon.com/dp/B092HX9435?ref=ppx_pop_mob_ap_share
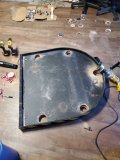
I did the cupholders replacement job for myself just today. I sawed right through the straps. The clip end of the straps seem to be attached by the piece on the strap that is pressed under the railing. Surely the integrity of the strap has been compromised but I get the feeling it will still hold the table together well enough for me to put it in the bag and zip it up.So a question I have not seen asked or answered. Have started to replace cupholders on my Barrington table. My question is this: How do you avoid messing up the straps that hold the table together when it’s folded. The straps are anchored under the cups at each end. There appears no way to remove them without removing the rail, and I would prefer to avoid that.
I believe the rail on the LED table is raised just a tiny bit to fit the lights, they’re like tucked under it. I didn’t have to actually glue the new ones in, I just pushed them into place right over the old ones. I’m not sure if they would fit under the regular table rail or not.Very cool! I have the newer Barrington without the LEDs. I feel like it would look odd if I just glued LEDs to the inside of the vinyl. Is the Barrington w LEDs railing designed differently?
I love this setup and have thought about it for a while.Thanks! I really like them. Here’s the ones I got from Amazon, I believe they’re the same ones linked somewhere earlier in the thread. First is the lights, second is the connectors and third is the dimmers I used.
https://www.amazon.com/dp/B0BVR755VK?ref=ppx_pop_mob_ap_share
https://a.co/d/0ie6XsZe
weideer 2Pcs DC12V-24V LED Strip... https://www.amazon.com/dp/B092HX9435?ref=ppx_pop_mob_ap_share
You should do it, it’s simple. If you order from the links above I’m confident you wouldn’t have any problems. I was the same way with the connectors and all that but once you get it all and look at it you can tell how they connect and what not.I love this setup and have thought about it for a while.
I'm curious if anyone has done the same thing with RGB cob replacements, and if so what they used? I find myself a little lost with connectors and whatnot. I'd love to get everything you got and just change it to RGB cob instead of just white.
I actually do already have the dimmers, love them!You should do it, it’s simple. If you order from the links above I’m confident you wouldn’t have any problems. I was the same way with the connectors and all that but once you get it all and look at it you can tell how they connect and what not.
For the actual install on the table I just pushed them under the rail right over the existing lights and it fits perfectly. No glue or anything like that and they haven’t moved at all. I would recommend getting the dimmers though, they’re pretty bright at 100% so it’s nice to be able to adjust them however bright you want.
I actually do already have the dimmers, love them!
I will eventually get something and I know I could figure it out given the right connections. My fear is some of the RGB COB lights have what visually appear to be slightly different connections, so I'm afraid I'll buy all this just to realize the connectors you linked don't match up to the rgb lights. Hate to waste money on guess and check stuff, ya know. Also, I just clicked the link and remembered, the last time I looked they were currently unavailable and they still are, so I'd have to wait for those to come back into stock regardless.
Oh that's riiight, I forgot about that part. I found some that were 10mm I think, but it was hardwired or something, I forget. Too many question marks with what I found for me to blindly buy and try at the time. Maybe I'll revisit it soon.The difficulty is finding RGB COB lights that are small enough.
I needed to find 8mm lights and the only COB lights I could find at that width were single color.
Every RGB COB strip I've found is 50% wider at 12mm.
They still might work, but I might be tight and a little more difficult to get them in there. If you do go that route, please report back! I'd be down to swap mine out eventually.
Thank you for this how-to post! It was my road map and gave me the confidence to do my own cup holder replacement. I’m happy to report that everything went well and my table came out looking great. I also gained some new found confidence in my woodworking abilities and am already planning my next project. Good times!I recently upgraded my cup holders after a couple of close calls of having drinks spilled onto the playing surface. The cup holders that come with the table are a joke (a very cruel and sad joke). If you're on the fence about upgrading yours, don't delay. Get them upgraded. They're a huge improvement.
View attachment 1289094
I was really encouraged by the posts by @dmoney and @greedyintern. Huge shout out to them and their guides. Those helped tremendously. This is dedicated to @Saoliver who asked for a video (in the thread - not to me personally) but this is as close to a video I could muster. I hope this is helpful.
Items/tools:
View attachment 1289142
- Replacement cup holders
- Gloves
- Eye protection
- Auto trim removal tool
- Screwdriver
- Hole saw (3 5/8") - (In retrospect, I would have used a different hole saw. Maybe the Milwaukee one)
- Tape measure
- Cardboard sheet
- Hole saw arbor
- 1/4" drill bit
- 1/8" drill bit
- Screw
- Drill
- Hair dryer (not pictured)
Step 1: Remove original cup holders
This step is pretty simple. Set the hairdryer on high heat and keep it approximately 1 inch away from the cup holder for about a minute. Most of the cup holders will only require a minute for the glue to loosen up. I only had a couple that needed more time. For those, I did it again for another minute.
View attachment 1289155
After the hairdryer, use the auto trim tool to pry the cup holder away from the loose glue. Work the tool around the cup holder while gently pulling the cup and glue apart.
View attachment 1289156
A couple of things to keep in mind when you remove the cup holder from the table:
- The cup holder will be hot from the hairdryer so wear your gloves.
- The glue will be very sticky so pull directly up and not to the side. Try not to get any on your the table/padding.
View attachment 1289157
Step 2: Mark the drill hole
Before you move onto this step, make sure all the glue has completely cooled off and dried.
This step is relatively easy but requires some concentration. The exactness of this step will ensure your new cup holders will be where you want them to be.
The original cup holders on my Barrington is measured at 3 1/2" across. You should double check yours if you're going to follow this step of my guide.
View attachment 1289168
The new cup holders measure 4" across.
View attachment 1289169
Since the size difference between the 2 cup holders is 1/2", we will need to mark the new center hole 1/4" away from the original center.
Here is a reference on how I calculated my center hole. I started the measure from the outer edge of the original cup holder. The idea is to mark the new center at the 2" mark.
View attachment 1289453
Here is a better visualization of this. The new center hole has to be 1/4" closer to the table and yet remain in center of the left/right side edges.
View attachment 1289461
I tried using a marker on the glue but found it difficult to accurately mark the exact location of the new hole. I decided to use a screw instead and that worked much better. The good thing about this is that I could move the screw easily to make fine adjustments as much as I needed. Once I've double (tripled!) checked my measurement I screwed in the screw to make a pilot hole. I didn't drill too deep - just deep enough to make a visible hole.
View attachment 1289462
Ultimately, I ended up with this outcome. I then took my 1/8" drill bit and drilled through the table using the pilot hole as a guide.
View attachment 1289471
Step 3: Drill out the new holes (from the bottom)
Flip the table upside down.
Before I drilled the hole with my hole saw, I drilled through the existing hole using the 1/4" drill bit. The reason for this is that the drill arbor is 1/4" so I wanted to make sure the arbor was aligned exactly to the new center. In retrospect, I suspect I could have used the 1/4" bit instead of the 1/8" bit in Step 2 and saved a step.
Drilling the hole was the worst part (for me). The hardest part was intentionally going slow and not hurry the process. The thing to note here is to stop drilling immediately after you've broken through to the foam. I was a nervous wreck trying not to over drill.
As you can see below, the foam is glued to the wood so I had to carefully separate the foam after I had drilled through the wood. Try to retain as much foam as you can in the original hole. This will help with the snugness of the new cup holder.
View attachment 1289474
Here is an "in progress" picture of the process. I really wanted to see the new cup holder put in so I did that one right away (it's rad). I was also doubting I did the math properly in Step 2 so I wanted to quadruple check it was right (it was). TRUST THE MATH!
I also wanted to show the new Barringtons have clearance for the holes without sawing any of the posts.
Please ignore my monstrosity of a drill. The nerds over at r/tools will ban me if they ever saw that thing.
View attachment 1289481
Step 4: Insert new cup holders and ENJOY
This step is easy and the most enjoyable. The new cup holders will be very snug (tight) in the new opening. I used a cardboard sheet to help me evenly apply pressure and knead the cup holder in. Think flattening pizza dough - same idea and motion.
Others mentioned having to tape their new cup holders with masking / duct tape to make them snug but I didn't have to do that. The foam and vinyl were enough to keep these cup holders very tight and snug. Oh, speaking of foam, trim away the excess foam that will be sticking out of the bottom after you're all done.
That's it! Enjoy your new rad cup holders!
Don't yell at me about my chairs. They're next to be upgraded!
View attachment 1289497
ThanksI did the cupholders replacement job for myself just today. I sawed right through the straps. The clip end of the straps seem to be attached by the piece on the strap that is pressed under the railing. Surely the integrity of the strap has been compromised but I get the feeling it will still hold the table together well enough for me to put it in the bag and zip it up.
You could make a template by cutting a paper circle the size of the cup holder. Then fold the paper circle in half in a couple of different directions, and where the fold lines intersect, is the center. Place the paper circle in the hole and mark the center with an awl or sharp point.I have the old Barrington table and I already pulled the cup holders out. Is there a better way of finding the center of the holes than just eye balling it? The leather isn’t cut evenly so it’s difficult to measure the center of the hole exactly.
This is genius! Thank youYou could make a template by cutting a paper circle the size of the cup holder. Then fold the paper circle in half in a couple of different directions, and where the fold lines intersect, is the center. Place the paper circle in the hole and mark the center with an awl or sharp point.
This is the wayYou could make a template by cutting a paper circle the size of the cup holder. Then fold the paper circle in half in a couple of different directions, and where the fold lines intersect, is the center. Place the paper circle in the hole and mark the center with an awl or sharp point.
And there's a post from @RadicusScout back in March, with a step-by-step guide to installing the larger cupholders, and not using the center, but offsetting it by 1/4":This is genius! Thank you
This is how I did it, worked perfectly.And there's a post from @RadicusScout back in March, with a step-by-step guide to installing the larger cupholders, and not using the center, but offsetting it by 1/4":
https://www.pokerchipforum.com/threads/barrington-poker-table-thread.30910/post-2405037
I decided to go deeper instead of jumbo, but do have his guide bookmarked. Thanks!And there's a post from @RadicusScout back in March, with a step-by-step guide to installing the larger cupholders, and not using the center, but offsetting it by 1/4":
https://www.pokerchipforum.com/threads/barrington-poker-table-thread.30910/post-2405037
Hey @greedyintern , the COB led connector package seems to be unavailable on Amazon. I don't know anything about these and would like to do the LED mod, is there another connector package on Amazon that is comparable?So I finished my Barrington mods (for now) but still need to order a topper.
New LEDs, Dimmer, AA Battery Pack, and Jumbo Cupholders
COB LEDs
I wasn't the biggest fan of the blue LEDs and didn't like how they were so spaced out. I saw someone talk about the COB LEDs and how they are amost diffused already and ordered the warm white and couldn't be happier. The LEDs are very close together so you don't need to put something in front of them to diffuse them like I was trying to do with the old LEDs. Instead of ripping out the old LEDs, I actually just wedged the new LEDs right on top of the current ones. It worked out great.
I did have to cut the light strip and attach another tail end. Very easy to do but measure accurately before you cut! You don't have much leeway with the 16.4ft strip. And then used the Y connector that also came with the COB connector package.
Screwed and glued on some velcro, glued velcro to the battery pack, then buttoned up everything else. Happy with it.
COB LED Lights
COB Connector Package
Dimmer
Battery Pack
Jumbo Cupholders
I went with the jumbos after reading recommendations. Pried off the old ones with a vise grip, drilled a center hole down with a standard bit, then drilled from the bottom up with the 3 5/8in hole saw starting it the pre drilled hole. I got them all done but it was a bit of a struggle with the hole saw I bought. If I would do it again, I would get one that was deeper. This one barely made it through both pieces of wood.
Jumbo Cupholders
Hole Saw (buy a deeper one)
View attachment 1252914
The battery pack is also unavailable. I'm looking for the same stuff lol just ordered 2 new tables to save some change instead of gorilla tables and wanting to upgrade the LEDs. Can you just use a dimmer on the existing LEDs? Does it take any extra hardware other than the dimmer switch posted earlier?Hey @greedyintern , the COB led connector package seems to be unavailable on Amazon. I don't know anything about these and would like to do the LED mod, is there another connector package on Amazon that is comparable?
Thanks!
Hey @greedyintern , the COB led connector package seems to be unavailable on Amazon. I don't know anything about these and would like to do the LED mod, is there another connector package on Amazon that is comparable?
Thanks!
The battery pack is also unavailable. I'm looking for the same stuff lol just ordered 2 new tables to save some change instead of gorilla tables and wanting to upgrade the LEDs. Can you just use a dimmer on the existing LEDs? Does it take any extra hardware other than the dimmer switch posted earlier?
")