Murder, (S)he Wrote: The Unofficial Murder Pr0n Thread (2 Viewers)

I see no benefit to oiling the clay where the label will go
I prefer to get full coverage on the chip and I also prefer not to worry about getting any on the label, so doing it prior allows me to be less careful. That's benefit enough for me.
 
  • Like
Reactions: ovo
I'm no expert, but I wouldn't oil before putting new labels on.
You can if you want
If you allow the time to dry properly it shouldn't matter.
You are correct sir! :)
I prefer to get full coverage on the chip and I also prefer not to worry about getting any on the label, so doing it prior allows me to be less careful. That's benefit enough for me.
Another work case is milled chips.
When you mill, you expose virgin material and it's often lighter than the rest of the chip that has been exposed to all the oils from all the fingertips.
So you may want to apply before labelling to ensure full coverage.

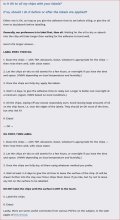
This is what we post on our FAQ:
GL - When to Oil.JPG
 
If I’m just piling cause chips want a consistent level of oil and as more of a finish I’d do it after. If I was oiling as part of brining chips back from the dead I do it before. But I also go heavy, let them sit several weeks. Remove and rework them in lightly, then labels.

It’s all about the condition and what you are trying to do.
 
Recently I bought a rack of chips that someone had murdered and they had done a terrible job. Once I took off the very 1st label I realized that there was this big gash under the label and basically once you notice something, you can't un-notice it....lol DON'T be that guy. Do us all a favor and either do it right or let someone that knows how to do it, do it for you!

I have chips come to me frequently that some PCF member has started and given up on. They almost always do a hack job on them. The sooner you recognize that you will not be able to do an acceptable job on them the better. In the pics below, the PCF member caught on pretty quickly and only damaged a couple barrels before giving up and leaving the murder job to someone more experienced/capable.

Be careful that you do not cut into the chip when you try your hand at murdering. If you just nick the clay under the inlay it is not a big deal, but if you make a deep (ish) cut you will be able to tell after the label is applied. Some might not care, but to me if you butcher the murder job and cut deep into the chip you have basically destroyed the chip. With a deep cut, even with a high quality label on, the cut will be both visible and leave a bump that can be felt. To me, and I am sure many others here, that is just not acceptable.

Here is what I am talking about. 1st pic is a pic of a chip that another member tried to murder. There is just no way to completely cover up that type of cut. All the other pics are of Red Rock $1's that I murdered. They are a great choice for murder as they are both great looking and plentiful at a very reasonable $1/chip. The only caveat is that the murderer needs to know what they are doing.


I now fully expect/demand someone conduct an experiment with Murder Repair products to fill botched inlay removal scars.

Maybe one of those sandable epoxies / plastic wood products from the hardware store…
 
Work in progress. those DJ labels are annoying

View attachment 1205806
Diamond Jacks are not the easiest chip to start on. They certainly are not the most difficult either...They are great though. Yours will look fantastic once done.

The carnage is fascinating and all, but you are required to show pics of the chips post murder job (naked) and the finished product. This is PCF after all...
 
Paper inlay removal is tough work. I'm finally making progress on quarters for a Sundance setView attachment 836317
View attachment 836318
Has anyone else dealt with paper removal under the inlay, these Sundance $1s have thick paper with 100 years worth of tobacco grease in there. Pretty sure there's also some hooker juice..

Any tips/advice for removing the paper underlayment is greatly appreciated!
 
Has anyone else dealt with paper removal under the inlay, these Sundance $1s have thick paper with 100 years worth of tobacco grease in there. Pretty sure there's also some hooker juice..

Any tips/advice for removing the paper underlayment is greatly appreciated!
I milled my 7/8" papers, worked like a charm compared to manual removal.
 
Has anyone else dealt with paper removal under the inlay, these Sundance $1s have thick paper with 100 years worth of tobacco grease in there. Pretty sure there's also some hooker juice..

Any tips/advice for removing the paper underlayment is greatly appreciated!
haha, yes...
You have just stumbled into murders hell. They are an absolute bitch to do and no one, to my knowledge, has discovered a solvent that works well on them. I have murdered probably 1000ish paper inlay chips and every one was miserable to do. The best solution I have found so far (and it isn't very good at all) is soaking in 70% isopropyl alcohol, scraping, rinse & repeat several times until you are happy with the result. Another member here asked me to try and murder some TRK's for him and they are paper. I did exactly 1 and I think he decided not to proceed. Honestly, I am relieved...

Just so everyone knows what paper looks like vs what Vinyl looks like: The 1st 2 pics are of Vinyl on the left and paper on the right. Once you know, it is VERY obvious. The rest are what the progression looks like on the murder of paper inlay chips = TRK or Paulson - both will be similar:


1697811586721.jpeg

You kill a beaver chip £25??????????
 
haha, yes...
You have just stumbled into murders hell. They are an absolute bitch to do and no one, to my knowledge, has discovered a solvent that works well on them. I have murdered probably 1000ish paper inlay chips and every one was miserable to do. The best solution I have found so far (and it isn't very good at all) is soaking in 70% isopropyl alcohol, scraping, rinse & repeat several times until you are happy with the result. Another member here asked me to try and murder some TRK's for him and they are paper. I did exactly 1 and I think he decided not to proceed. Honestly, I am relieved...

Just so everyone knows what paper looks like vs what Vinyl looks like: The 1st 2 pics are of Vinyl on the left and paper on the right. Once you know, it is VERY obvious. The rest are what the progression looks like on the murder of paper inlay chips = TRK or Paulson - both will be similar:


Alright, so I'm pretty much on my own to experiment further and see what works best. I'll give isopropyl a shot, appears that has worked best for most. Thanks for your advice and shared experiences, was really hoping someone has already found the magic recipe.
 
tips/advice for removing the paper underlayment
Besides sending them to us to scrape? ;)

For realz tho...anything with paper automatically goes to the high end of our scale.
Shaped paper and TRK we charge the most for...they can be literally painful to do well.
I have 3 words for you...Labor of Love.
soaking in 70% isopropyl alcohol, scraping, rinse & repeat several times
Judging from Nanook's response, our methods are different.
We use no chemicals, and we have a consistent method that requires 4 passes at the chip. (and no we won't detail it, if you are good at something never do it for free...)
Pass 1 - Remove plastic outer layer.
Pass 2 - Scrape off the paper.
Pass 3 - Scrape off the glue.
Pass 4 - Clean the chip.

We listen to a LOT of podcasts to the sound of scraping chips...
 
You have just stumbled into murders hell.
I milled my 7/8" papers, worked like a charm compared to manual removal.
I’m sometimes left with a VERY thin strip of inlay after milling that’s quite difficult to remove. Looks like the manual method leaves some residue behind also?

I think it’ll be imperceptible after I put the new label in anyway, and can barely be seen from alternate angles as-is.
IMG_3905.jpeg
IMG_3904.jpeg
 

Create an account or login to comment

You must be a member in order to leave a comment

Create account

Create an account and join our community. It's easy!

Log in

Already have an account? Log in here.

Back
Top Bottom